INSTALLATION TUTORIALS
Evaporative coolers can be installed by Neil official agents or by the user. Proper installation provides safety, prevents possible water leaks, and ensures that the evaporative cooler works to its full potential.
Many of the related breakdowns or decreased performance of Neil evaporative coolers are caused by incorrect installation, because the person in charge of installing the evaporative cooler did not have the necessary training.
For this reason, from Neil Evaporative Coolers we prepare the following tutorial videos in order to offer anyone who wants to do the Installation a simple and effective tutorial. To install a Neil Evaporative Cooler correctly, we invite you to watch the following videos.
Evaporative coolers can be installed by Neil official agents or by the end user. A correct installation provides security, prevents possible water leaks, and guarantees that the evaporative cooler will be working to its full potential.
INTRODUCTION
Neil Evaporative Coolers are designed so that the user can install it perfectly. Along with the Evaporative Cooler , all the necessary accessories are supplied (weatherstrips, hoses, screws, etc.) and it is only necessary to have some tools that are detailed below.
Unboxing
Tools required
1 -Preparation of the vehicle-
To install a Neil Evaporative Cooler there are two possibilities. You can place the space occupied by sunroof (video: «WITH sunroof») or make a cut in the ceiling to place it (video: «WITHOUT sunroof»)
In case of making the ceiling cut, we recommend downloading the «Ceiling Cut template», which once assembled will allow you to know the recommended measurements of the hole to be made, where to place the weatherstrip and how much each model of evaporative cooler will protrude back and forth.
Preparation of the Vehicle without sunroof (roof cut)
Preparation of Vehicle with sunroof
2 -Setting the evaporative cooler-
After clearing the space where the Neil device is going to be, it must be placed and then adjusted correctly. Depending on the model of evaporative cooler, it may be necessary to install it from above or to install the base from above and the control panel from inside the vehicle.
Setting (Premium 700 )
Setting (Camper - Slim Full)
3 -Placement of the water tank-
Trucks: In large vehicles the water tank is recommended to be placed behind the cab at least 1.5 meters below the level of the Evaporative cooler.
Van and Trucks *: For medium and small vehicles the tank can be accommodated inside the vehicle, it will depend on how it is equipped to see where it is convenient to place the tank. As a general rule, it is recommended to locate it in a place where the tank can be well secured and where you have easy access for the water load.
* It may be necessary to assemble a structure (not included) that allows the deposit to be placed correctly.
Motorhomes: The evaporative cooler system allows the Motorhome´s water tank to be used. Depending on the model of evaporative cooler, it will have submersible pumps that can be placed directly inside the tank or traditional pumps that must be placed on the outside of the tank.
Placement of water tank (Truck)
4-WATER PUMP installation-
If your Neil device has a brushless water pump it is very important that the pump is placed in the correct position.
- The water intake to the pump must always be «HORIZONTAL» (1st image) or upwards (2nd image).
- The pump intake must ALWAYS be below the water level. This pump does NOT work by suction.
- The water intake should NEVER be face down (even if it is below the water level). This position creates an air bubble that prevents the pump from working properly. (4th Image)
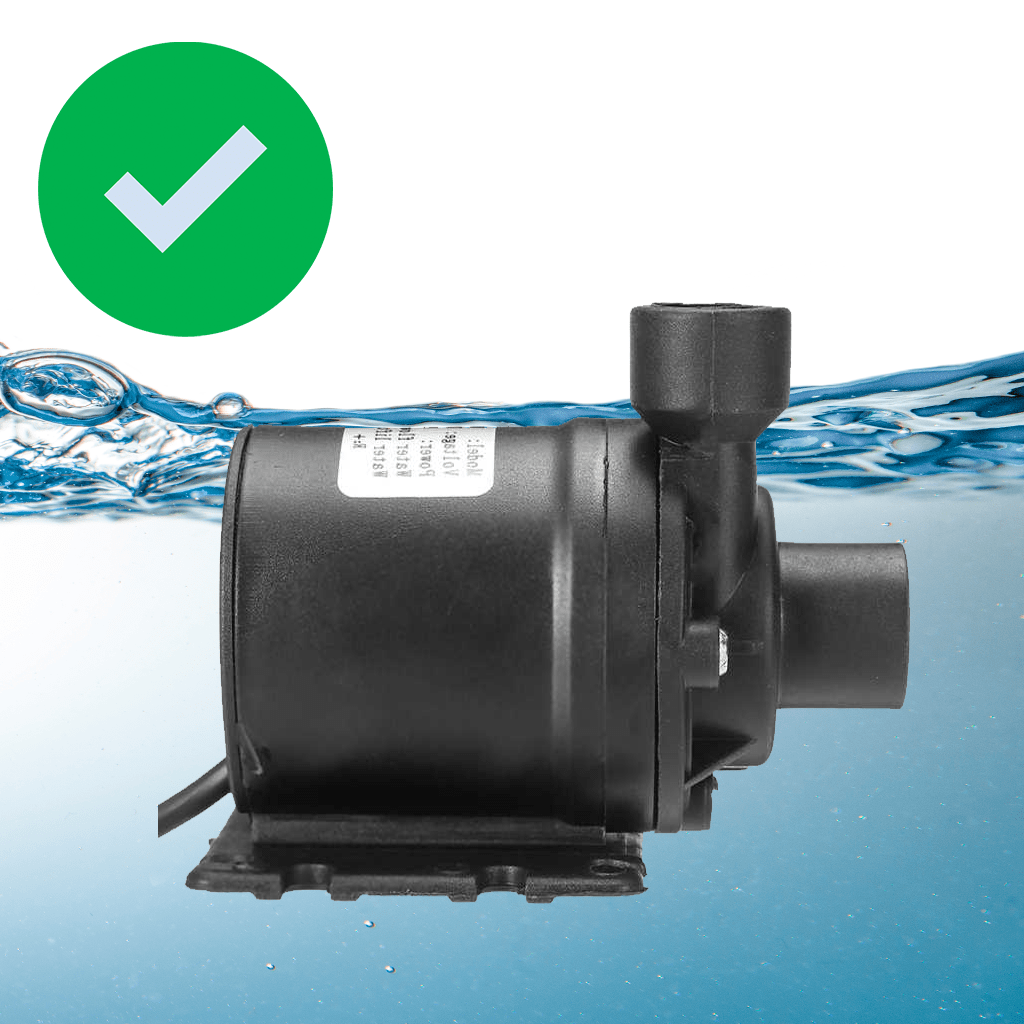
OK
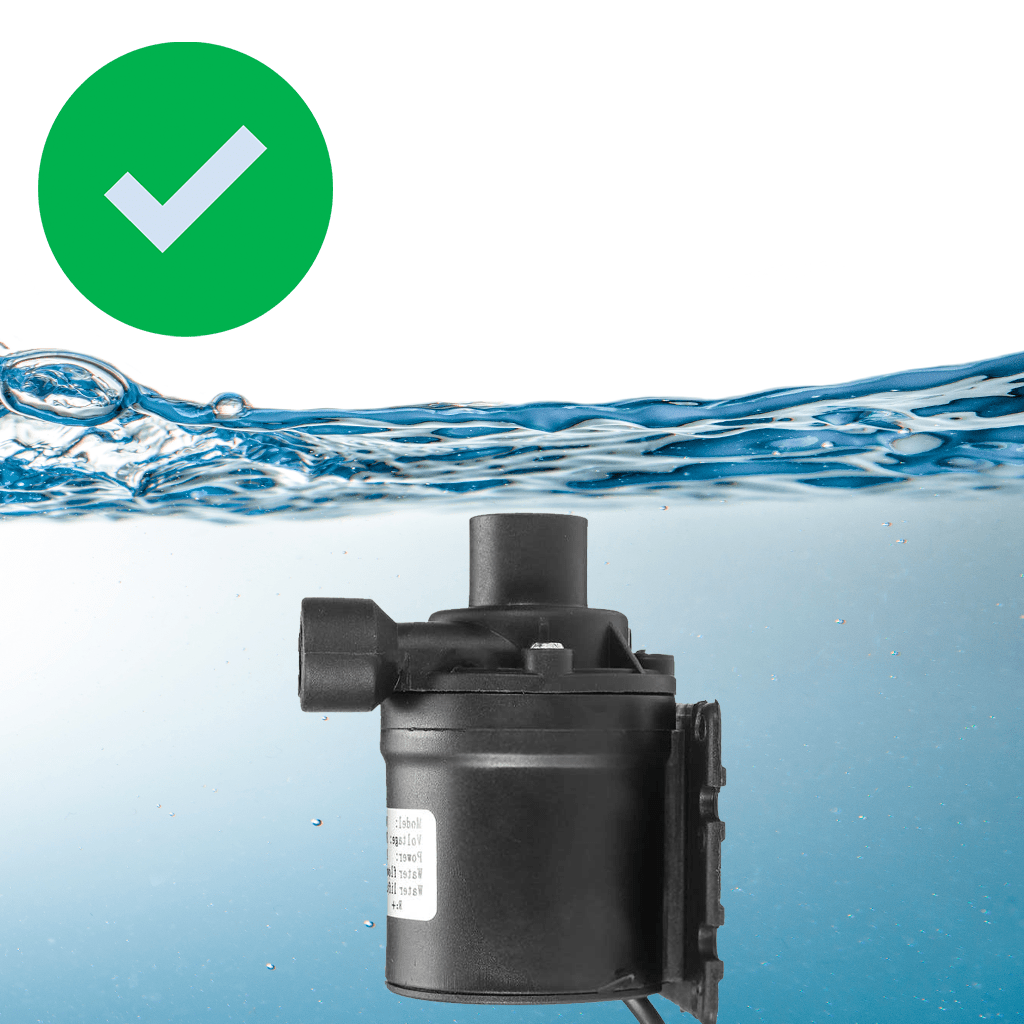
OK
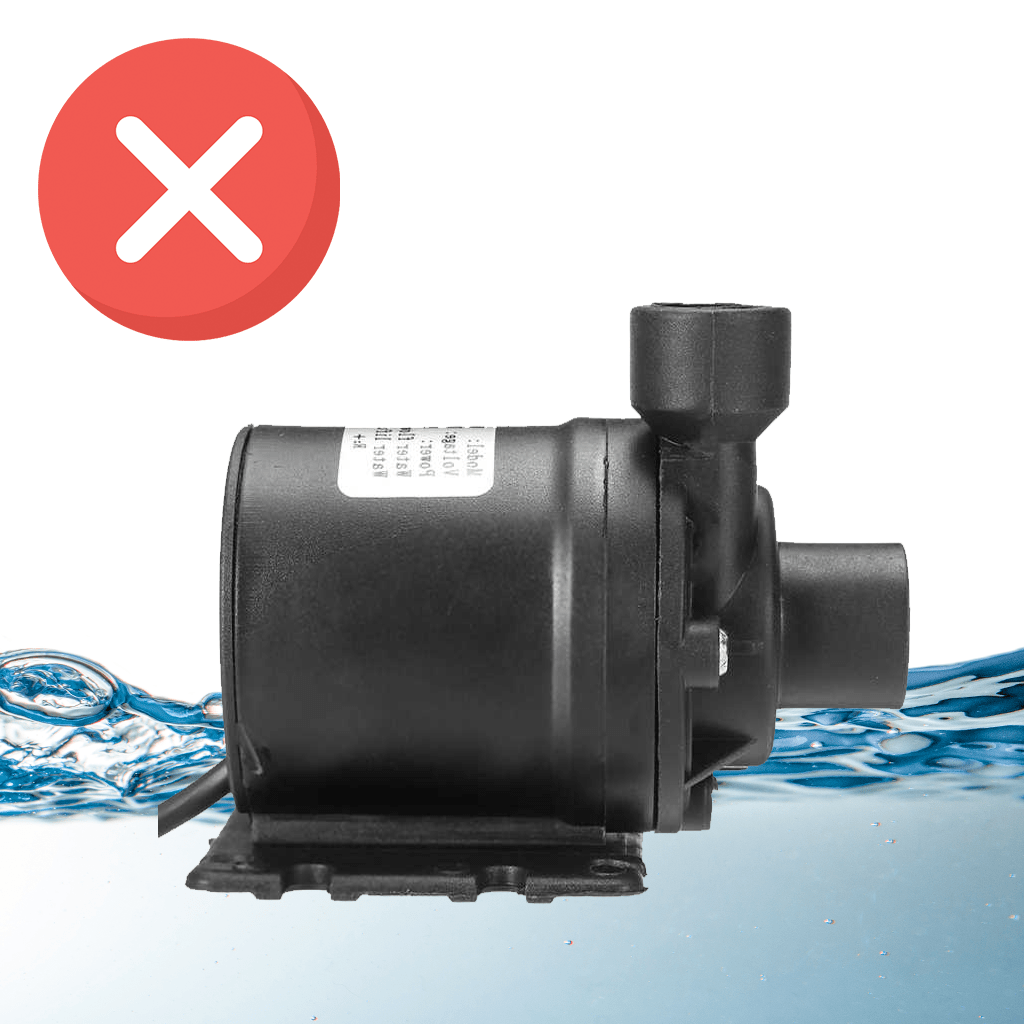
wrong
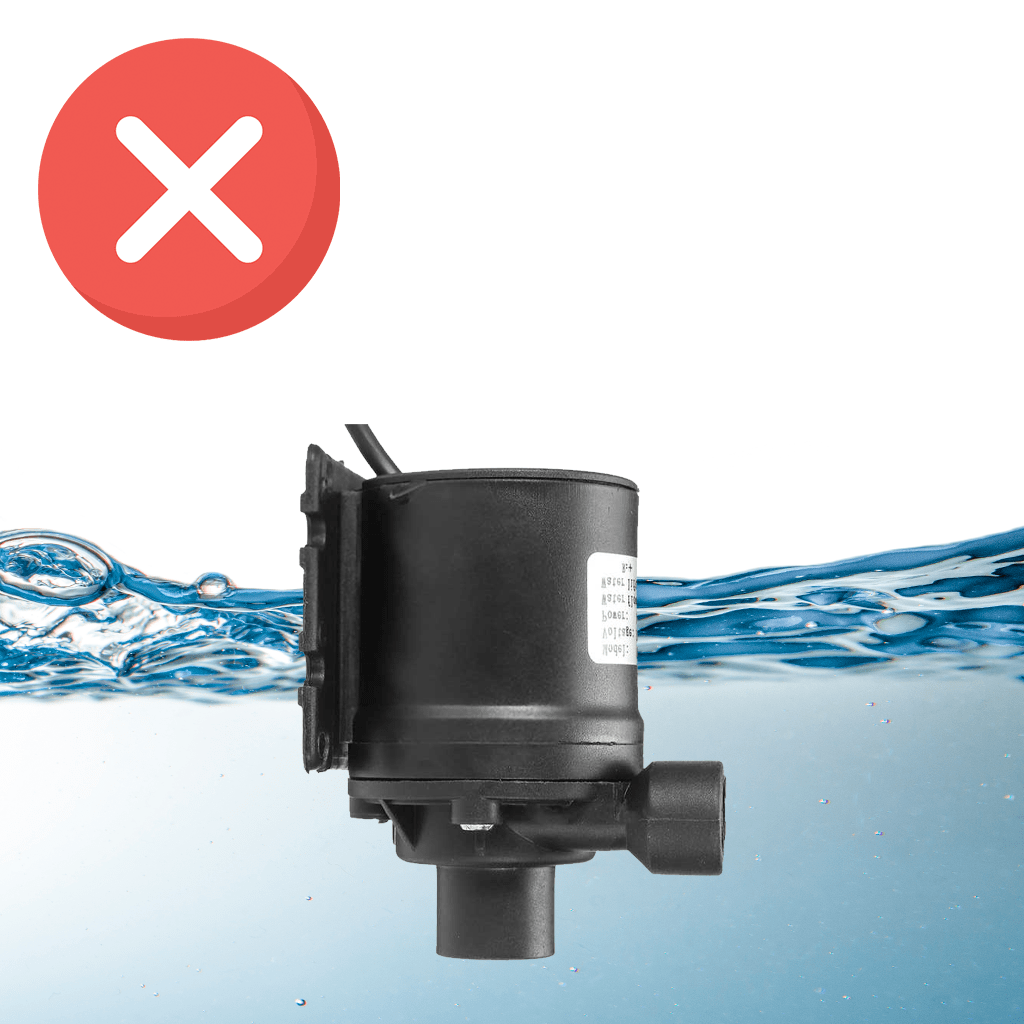
wrong
5 -Installation of hydraulic hose -Electric-
Once the evaporative cooler and the water tank are installed and adjusted, it is necessary to make the electrical and hydraulic connection (between the evaporative cooler, the water tank and the vehicle´s battery). This connection can be made inside the vehicle (Vans and Motorhomes) or outside the vehicle (Trucks), depending on whether the water tank is inside the vehicle or outside.
IMPORTANT: For a correct operation of the Evaporative Cooler it is important NOT to strangle the hose in any part of the route, trying to smooth the curves and avoid right angles.
Exterior electrical installation (Truck)
Internal electrical installation (Motorhome)

Important: DO NOT place a Check Valve on the Neil Evaporative Cooler.
If you install a non-return valve, it can flood your Neil and enter water into your motorhome.
6-Use of the evaporative cooler-
Once the Neil Evaporative Cooler is installed correctly, you can start using it. In the following videos you will find how to make use of the evaporative cooler functions, depending on the controller of your model.
Connect controller (Bluetooth)
Premium controller (until 2023)
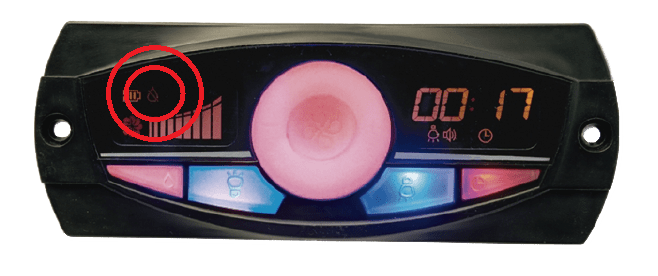
Important: If when installing the evaporative cooler and turning it on, the water does not reach the evaporative cooler and the droplet begins to blink on command, it is likely that you should increase the power of the external tank pump.

set power -Connect command-
set power -Premium command-
Neil makes the Installation Manuals, the Quick Use Guide and the Maintenance section available to all its customers, so that they can quickly and efficiently resolve any questions that may arise about the use and operation of the evaporative cooler.
For questions or queries contact us by e-mail at sales@neil.com.ar or you can send a WhatsApp message to our technical support

