MAINTENANCE
OPERATION OF THE NEIL EVAPORATIVE COOLER
Evaporative coolers work by evaporation, so their performance will be determined by the outside temperature and the relative humidity (RH). Its operation and performance are DIFFERENT than an air conditioner. The following table shows the performance of a Neil Evaporative Cooler given the conditions of relative humidity and ambient temperature.
You can measure the air outlet temperature of the Neil Evaporative Cooler and compare it with the following table to determine if your Neil device is working properly.

FIND THE SOLUTION TO YOUR PROBLEM
BASIC TECHNICAL VERIFICATION (THIS SIMPLE PROCEDURE SOLVES 85% OF THE PROBLEMS)
Before you start basic maintenance….
1. Make sure the water tank is full.
2.Turn ON the evaporative cooler , remember that it takes about 40 minutes to reach its optimum performance.
3. After at least 20 minutes have passed, the evaporative cooler may have gone into Ventilation Mode (You will see the droplet blinking on the command). If this happens, water is NOT getting from the tank to the cooler.
4. If after 20 minutes the evaporative cooler is still in Cold mode (the droplet on the command remains on), the problem must be in the Humidifier System and/or in the filter.

WET FILTER REVIEW
3. Visually check the condition of the wet filter. A dirty or crushed filter lowers the performance of the evaporative cooler. The filter is recommended to be cleaned after the first season of use and replaced after the second season*.
* A season is a summer of use.

Dirty Filter

Crushed Filter
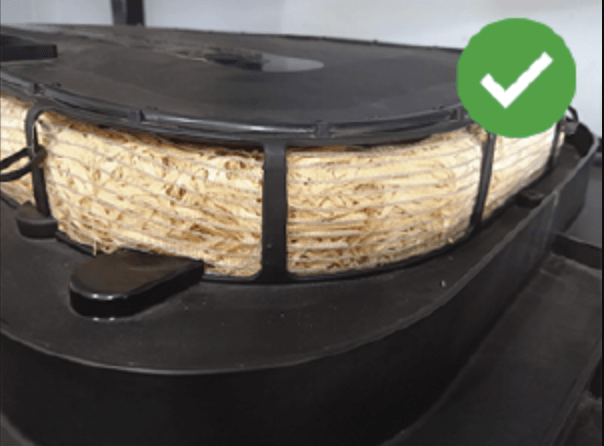
OK Filter
How to replace a Wet Filter?
Camper
Premium 700
REVIEW OF THE MOISTURIZING PUMP:
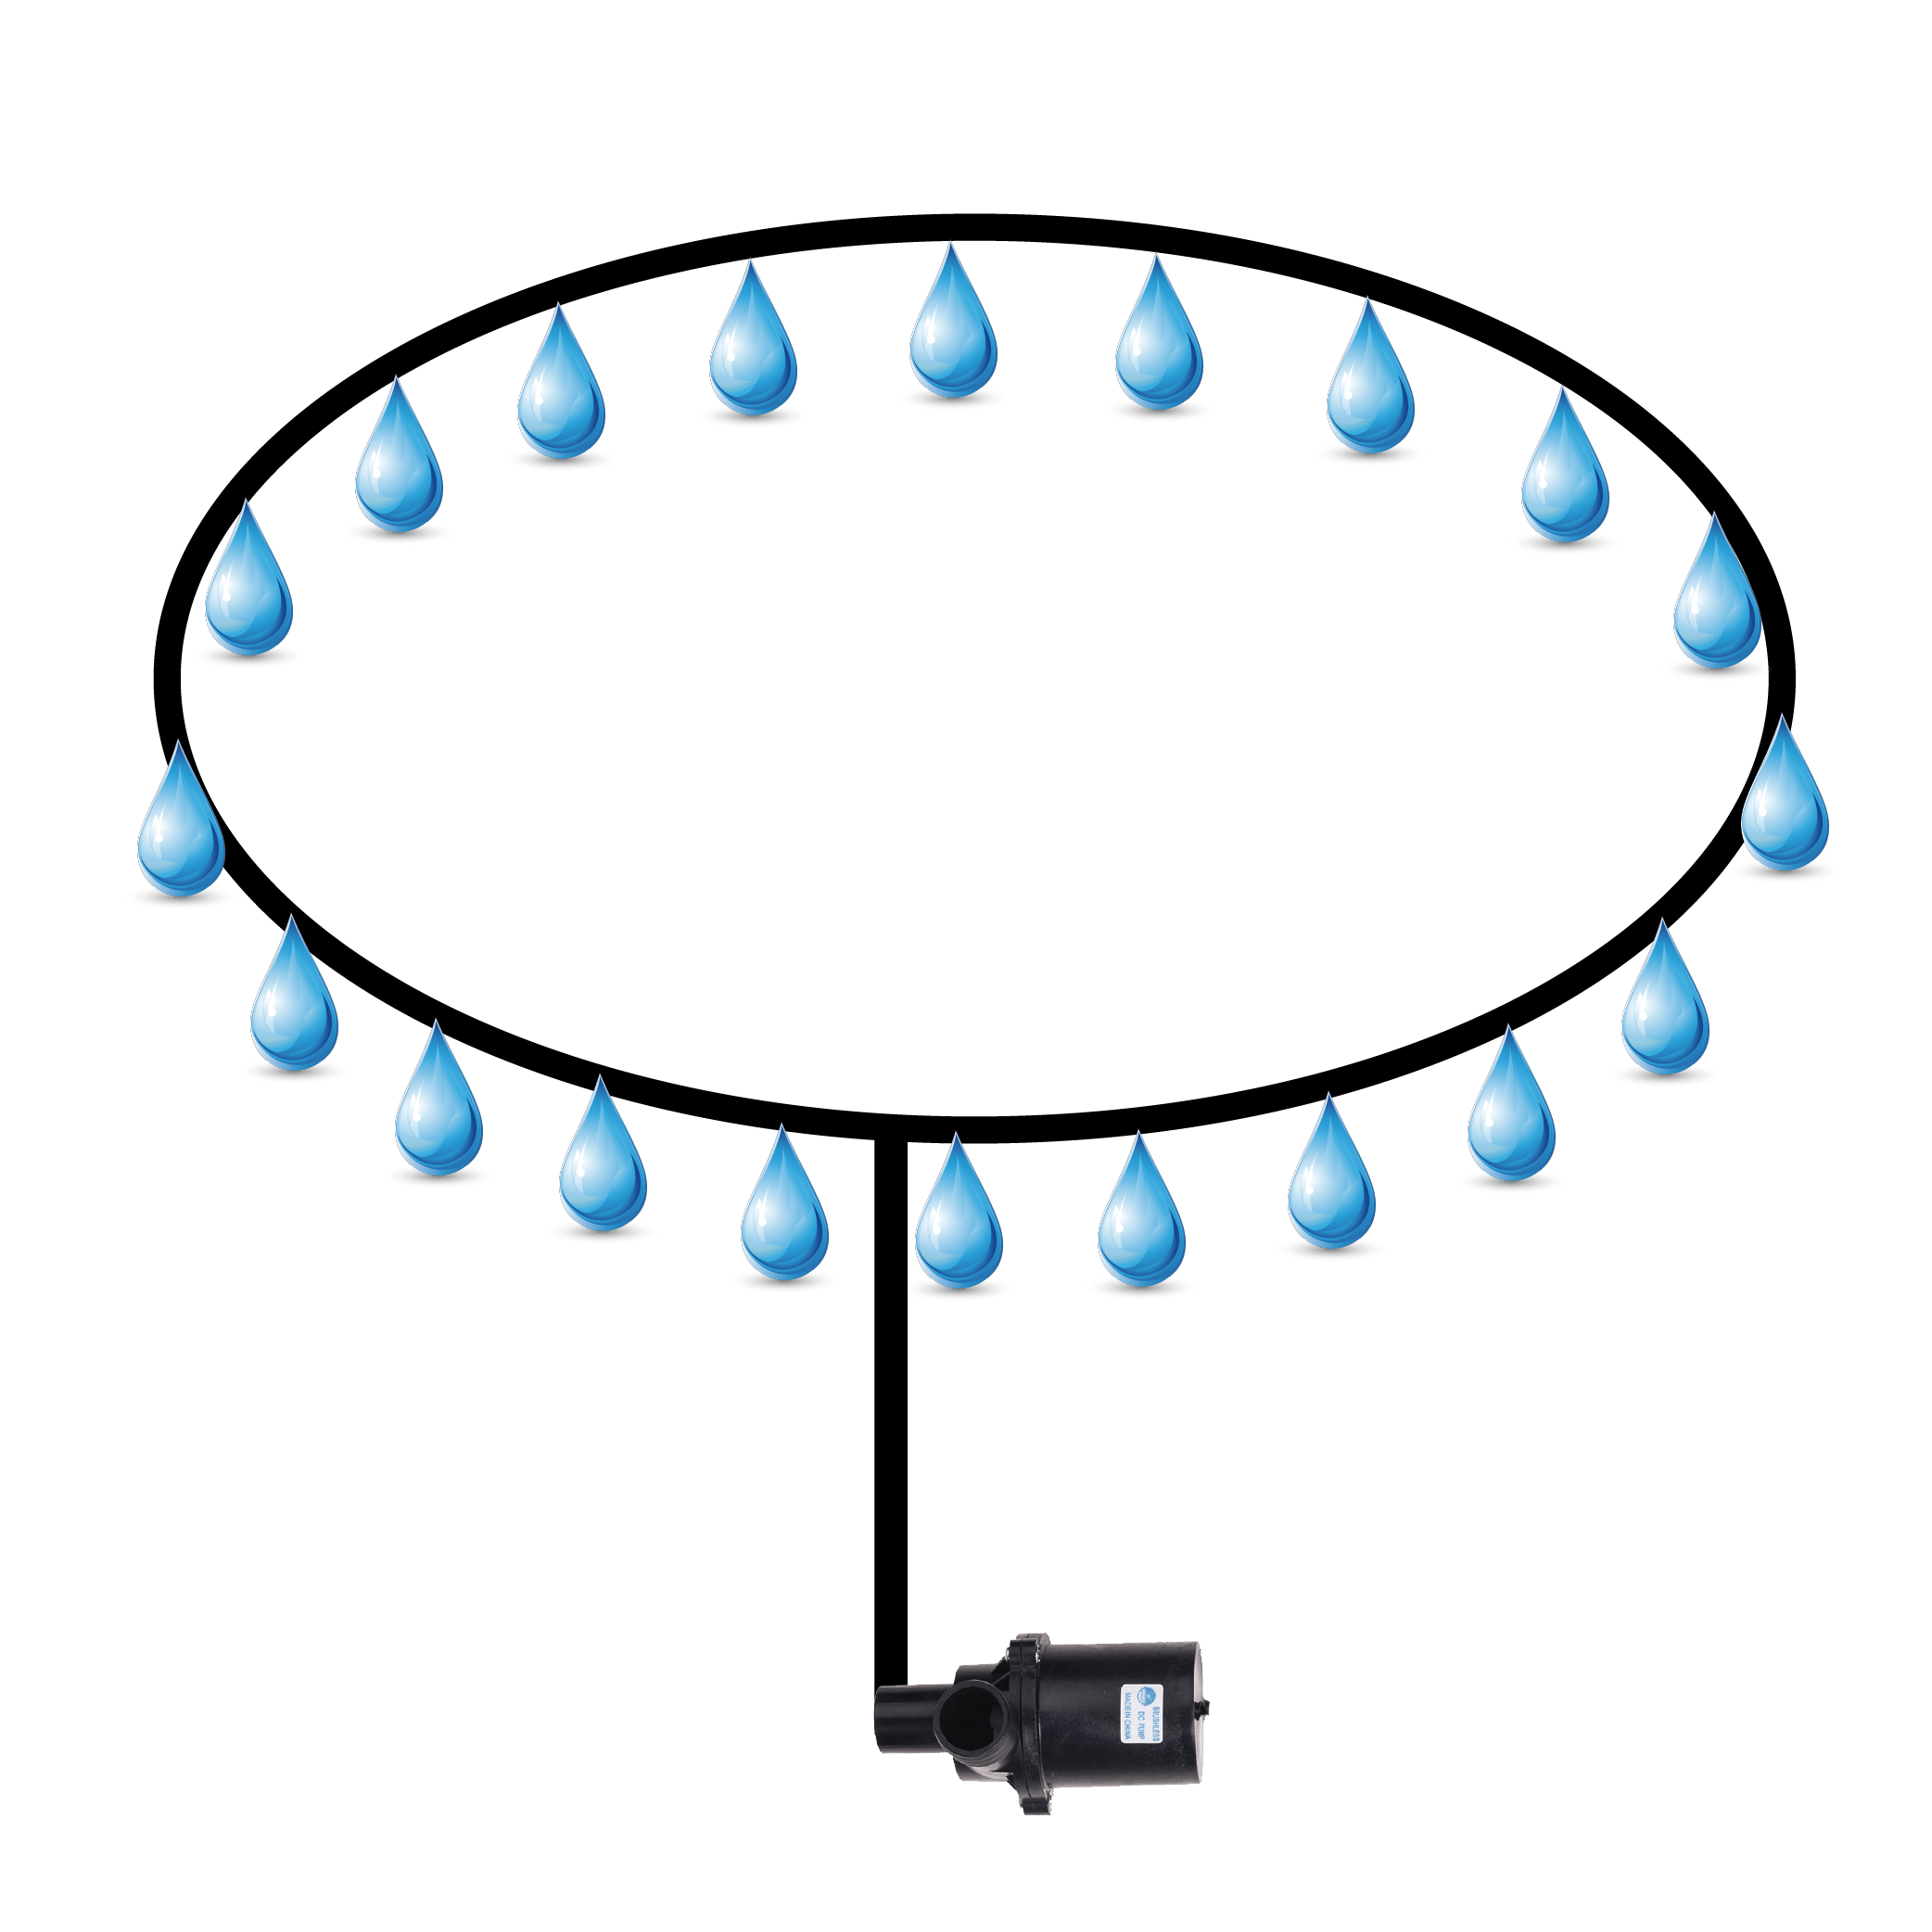
1.If the evaporative cooler does NOT go into ventilation mode (remains in Cold mode) the problem must be in the Humidification system. Remove the shell of the evaporative cooler, in case the spray tube is connected to the shell (Master, Slim Full and Camper Models) remove it and place it on the wet filter.
2.Remove the sensors from the pre-cooling chamber and put them together. When the sensors make contact, the air conditioner interprets that there is water in the pre-cooling chamber.
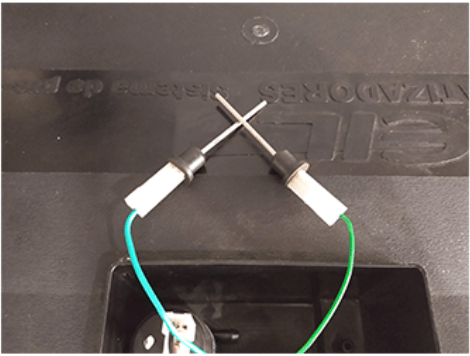
Put sensors together
3. Turn on the evaporative cooler and set the fan to minimum.
4. Every 20 or 45 seconds (depending on pump model) you should hear the humidifier pump (traditional pump models only) and see water trickle out of the spray tube holes (in ALL models).
5. Once it is confirmed that water is coming out of the spray tube and that the filter is being humidified correctly, it means that the Humidifier Pump is working correctly.
-> In the event that the water is NOT coming out of the spray tube, most likely the pump is burnt out and must be replaced.
Note: Keep in mind that electronic pumps are very quiet and can sometimes become clogged by dirt. We recommend you to remove it from the evaporative cooler, disassemble it, clean it and put it back.
How do I replace the Humidifier pump?
Master - Slim Full - Camper
(traditional pump)
Camper
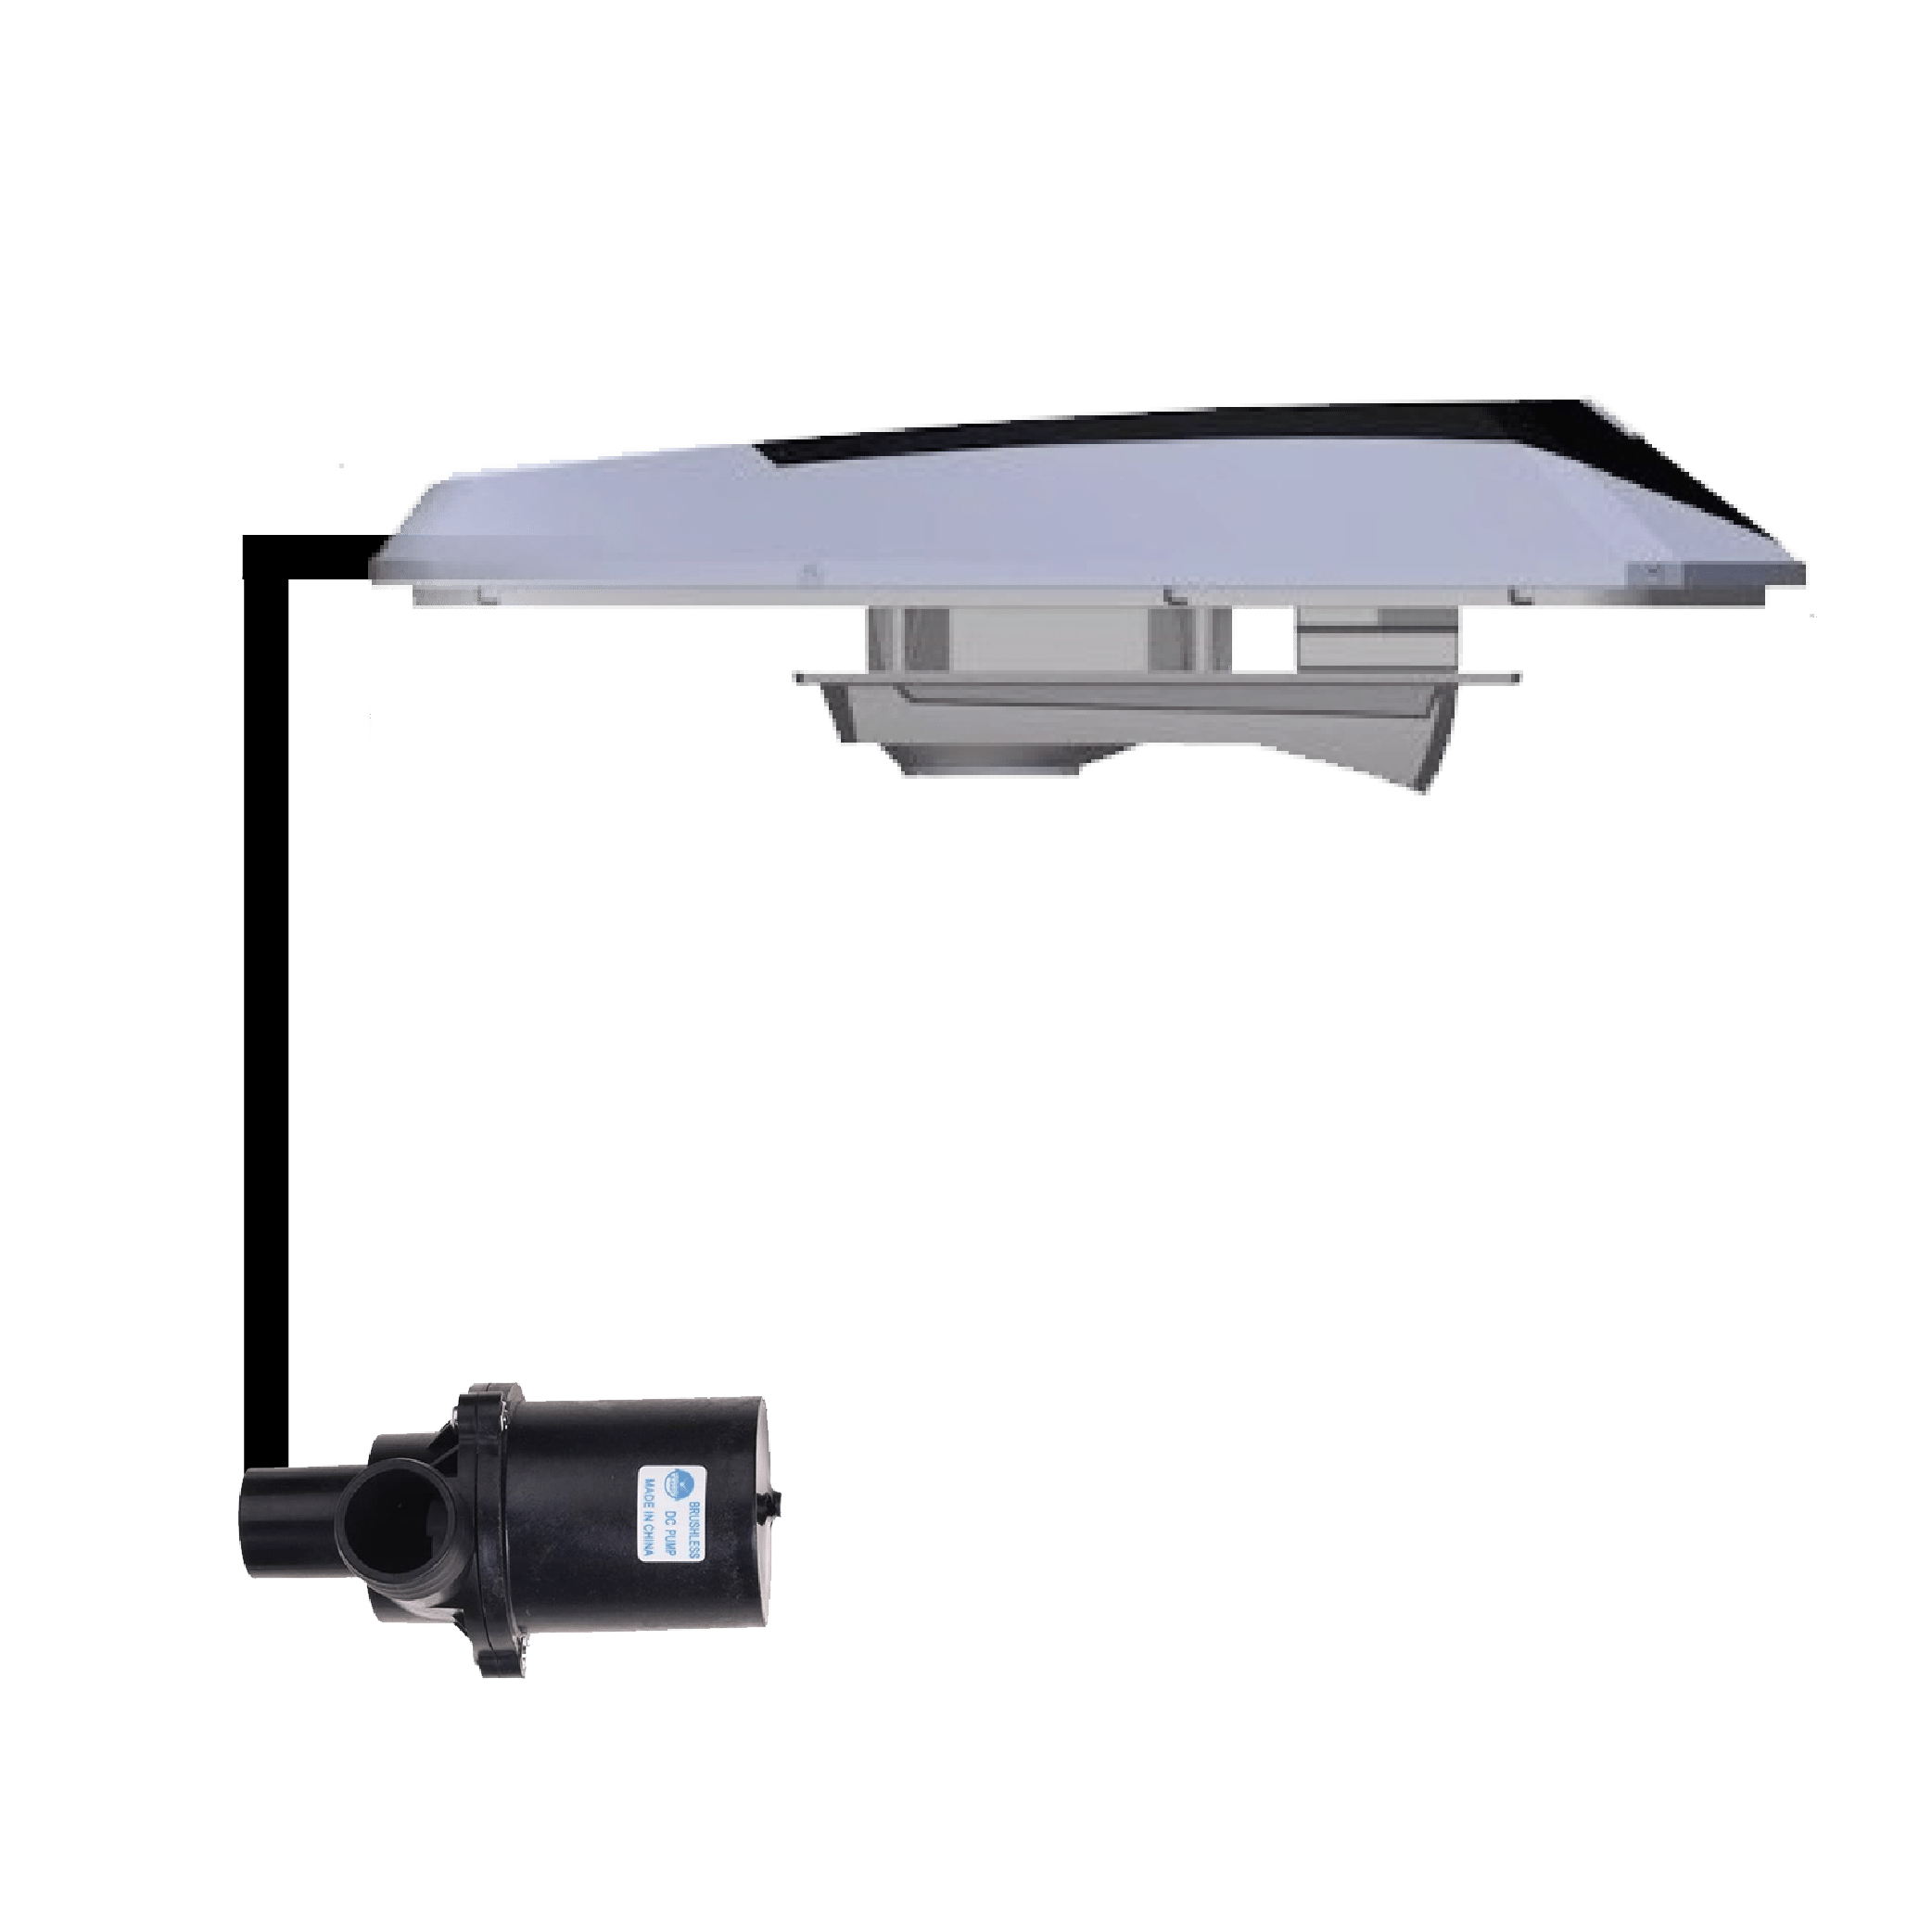
(brushless pump)
Fusion - Agro - Premium 700/900
(traditional pump)
-> In case you hear the Pump and the water is NOT coming out of ALL the holes in the spray tube::
- Check that ALL holes in the spray wand are clear (they may have become clogged after several years of use).
- Check that the «T» is not obstructed.
- Make sure that the pump, in addition to making noise, is sending water.
IMPORTANT: If you use heavily SCALED water, the holes may clog over time. It is necessary to uncover them to guarantee correct operation of the evaporative cooler.
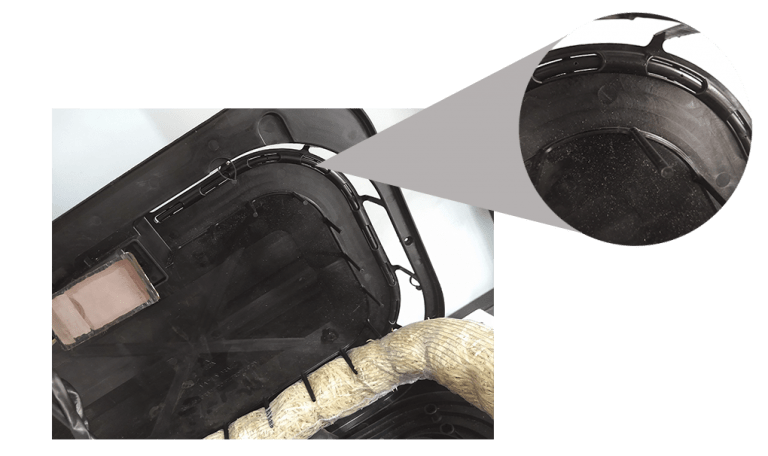
Spray Tube (Premium 700)
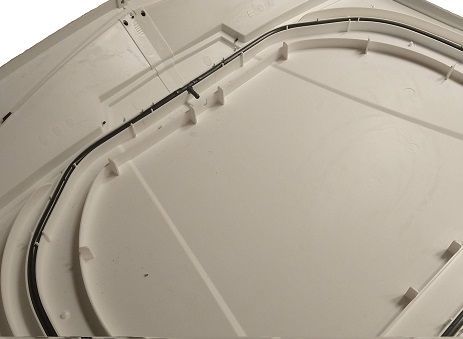
Spray Tube (Camper)

"T" connector
Tank Pump Review:
1. If the evaporative cooler goes into «Ventilation» mode (the droplet on the command blinks or the droplet is off), it means that water is NOT getting from the external tank to the evaporative cooler.
2. Turn off the evaporative cooler and turn it back on.
3. You should hear and/or feel the tank’s water pump vibrate (in the case of the brushless pump you will NOT hear it, but you will feel it vibrate). Two things can happen, that you DO hear/vibrate the pump or that you DO NOT hear/vibrate it
In case you do NOT hear/feel the water pump:
- If this is the first time you use the Evaporative Cooler, it may be necessary to increase the power of the external pump. Increase power Bluetooth command, Increase power premium command.
- You must determine if electricity is getting to the pump or not. For that you must use a tester to measure the electricity that reaches the external pump. Turn off and turn on the Evaporative Cooler (at that moment the current is sent to turn on the external pump)
- If the power that arrives is 12v or 24v (depending on your vehicle) it means that the water pump is burned out and you must replace it.
- If the power that arrives is less than the voltage of the vehicle (9 or 10v arrive instead of 12v, for example) you should adjust the power of the commando.
- Increase power Bluetooth command, Increase power premium command.
- If there is NO electricity, there is probably a problem in the electrical sleeve that connects the external Pump with the Evaporative Cooler. Check the routing of the sleeve and make sure the connectors are OK.
If you hear/feel the water pump:
- If this is the first time you use the Evaporative Cooler , it may be necessary to increase the power of the external pump. Increase power Bluetooth command, Increase power premium command.
- The hose may be choked somewhere along the way and for that reason the water does not reach the air conditioner. Check the hose to make sure it is NOT clogged.
If after these steps, it is NOT solved and the evaporative cooler continues to go into ventilation mode, you must go up to the roof of the vehicle, remove the shell and check the interior.
1. Remove the Evaporative Cooler shell and if the spray tube is connected to the shell remove the spray tube and place it on the wet filter.
2. Remove the sensors from the pre-cool chamber and separate them.
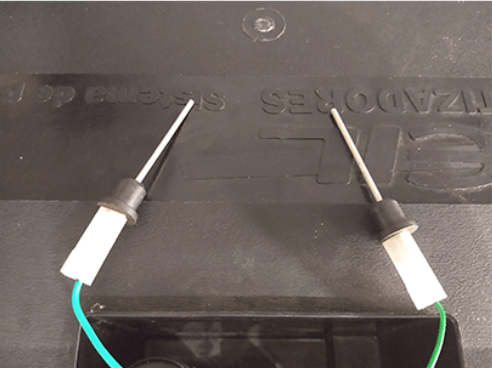
Separate Sensors
3. Disconnect the charge hose and place it in an empty container so that you can measure how much water is entering the pre-cool chamber.
4. Turn on the evaporative cooler and set the fan to minimum.
A. You should see water coming out of the charging hose for 12 to 25 seconds (depending on pump type). If you use traditional pumps, you will also hear them, while if your evaporative cooler uses electronic pumps, you may not hear them.
B. In case NO water is arriving:
- If this is the first time you use the evaporative cooler , it may be necessary to increase the power of the external pump.Increase power Bluetooth command, Increase power premium command.
- It is likely that the pump is burned out, in this case you will have to replace it.
Important: If your evaporative cooler has an electronic pump, it is recommended to disassemble the pump and clean it. It is likely that once cleaned it will work correctly again)
- It can also happen that the hose that carries water from the tank to the evaporative cooler is choked. We recommend blowing at one end to make sure there are no obstructions.
C. If water is arriving, but it arrives less than 350 cubic centimeters (approx.):
- Check that the hose that goes from the water tank to the air conditioner is NOT choked.
- If the horizontal distance between the water tank and the evaporative cooler is too great (for example in motorhomes) it may be necessary to increase the power of the tank pump. You can see how it is done in the following video: Increase power Bluetooth command, Increase power premium command.
If after these steps, it is NOT solved, contact our technical service.
The Evaporative cooler does not turn on
If the evaporative cooler DOES NOT turn on, it is probably an electrical problem, where power is NOT reaching the command or is burned.
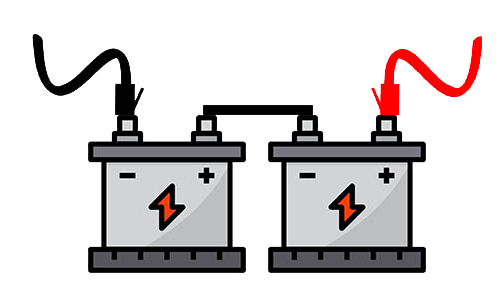
1- Connection of the evaporative cooler to the battery
Check that the connection of the evaporative cooler cables to the vehicle battery are correctly positioned, that they are NOT loose and that they are not leaking. In the event that it is loose, you must adjust them and if they are leaking, you must remove them, clean them and reconnect them.
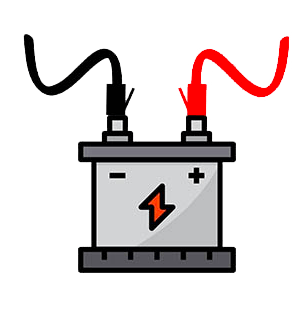
12V
24V
2- Evaporative cooler Fuse Status
The evaporative cooler has a fuse that is placed near the battery, it is necessary to check it to make sure that it is NOT burned. If it is blown, replace it with a 15 Amp fuse.
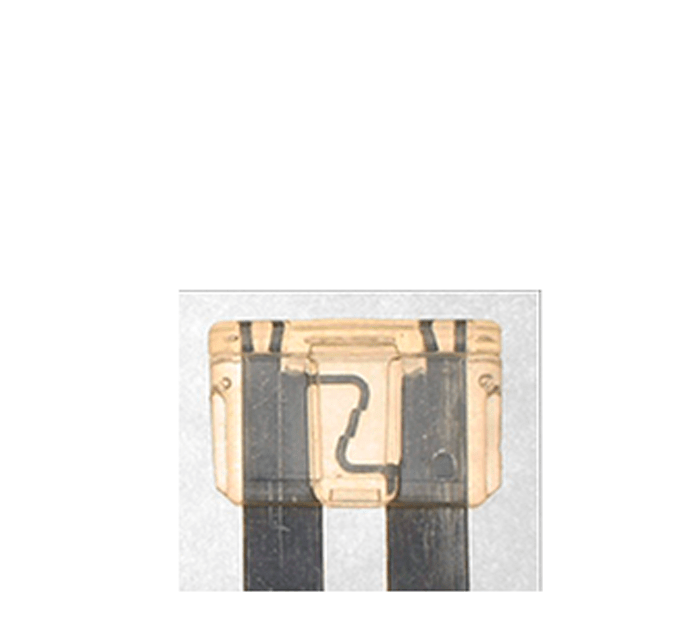
Fuse ok
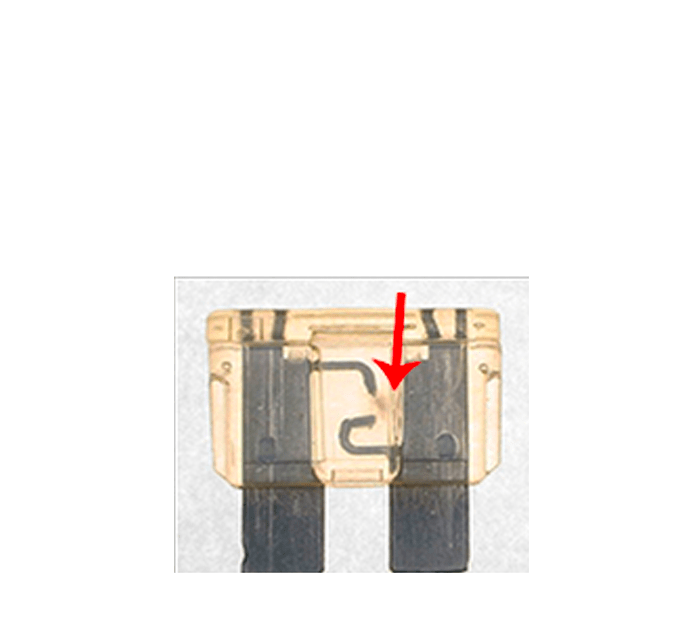
blown fuse
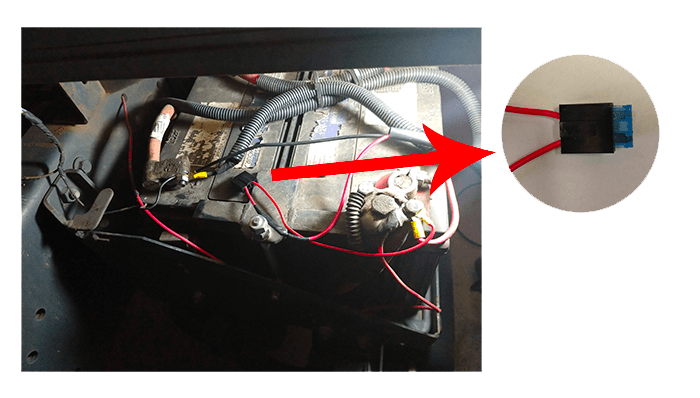
where is the fuse holder located?
3- Command connection
Movement and vibration after several years of use can cause the cooler to become disconnected from the Installation sleeve. It is necessary to check at the rear of the evaporative cooler that the sleeve is correctly connected.
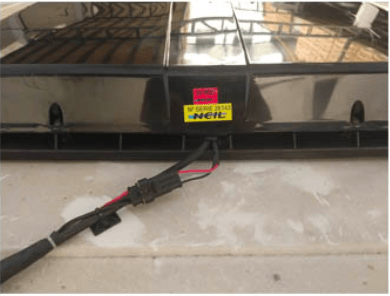
Connection tab location
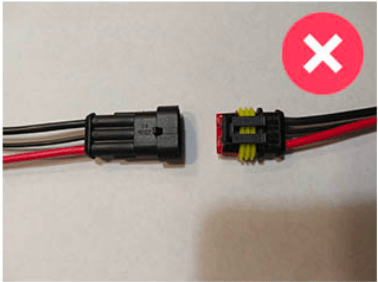
bad connection
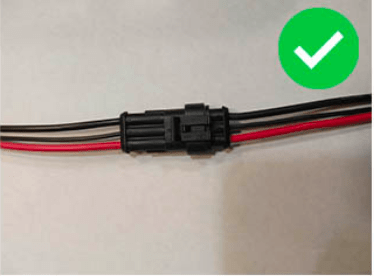
connection ok
4- Command (burned)
It is very difficult for the Command to burn up but it could happen. Perform a visual inspection to identify signs that the command is burned up.
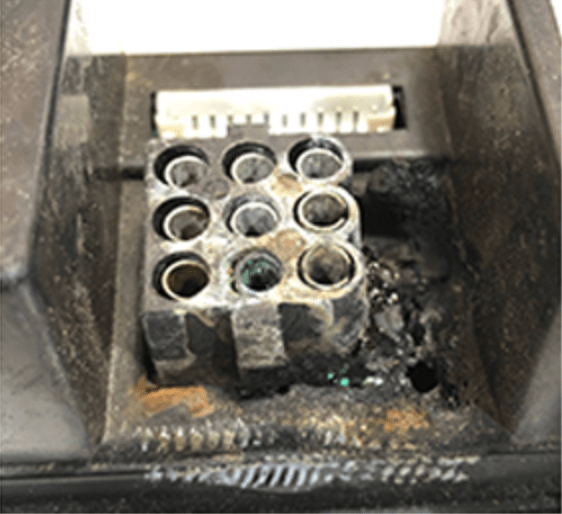
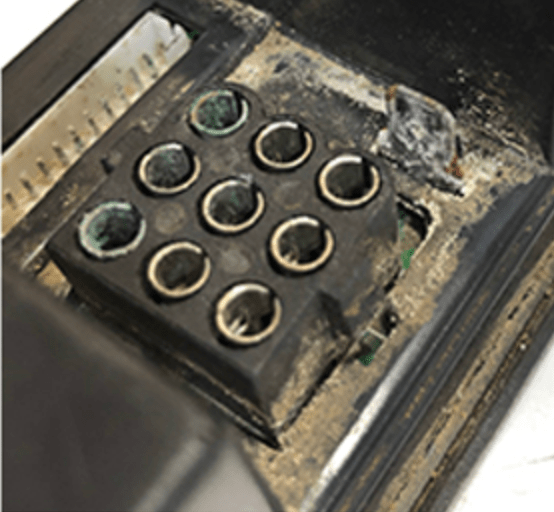
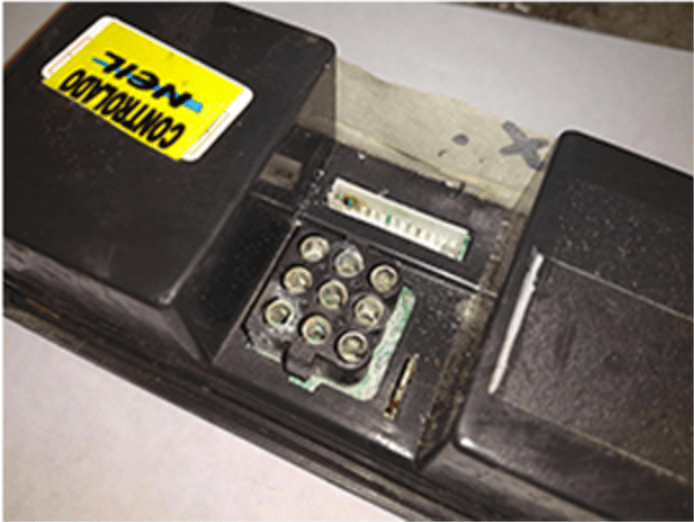
Command burned up and / or sulfated
If the command is burned up, you must request a new command so the evaporative cooler works correctly again, once the problem that caused the failure has been corrected.
5- Connection tab
There is some problem in the connection tab.
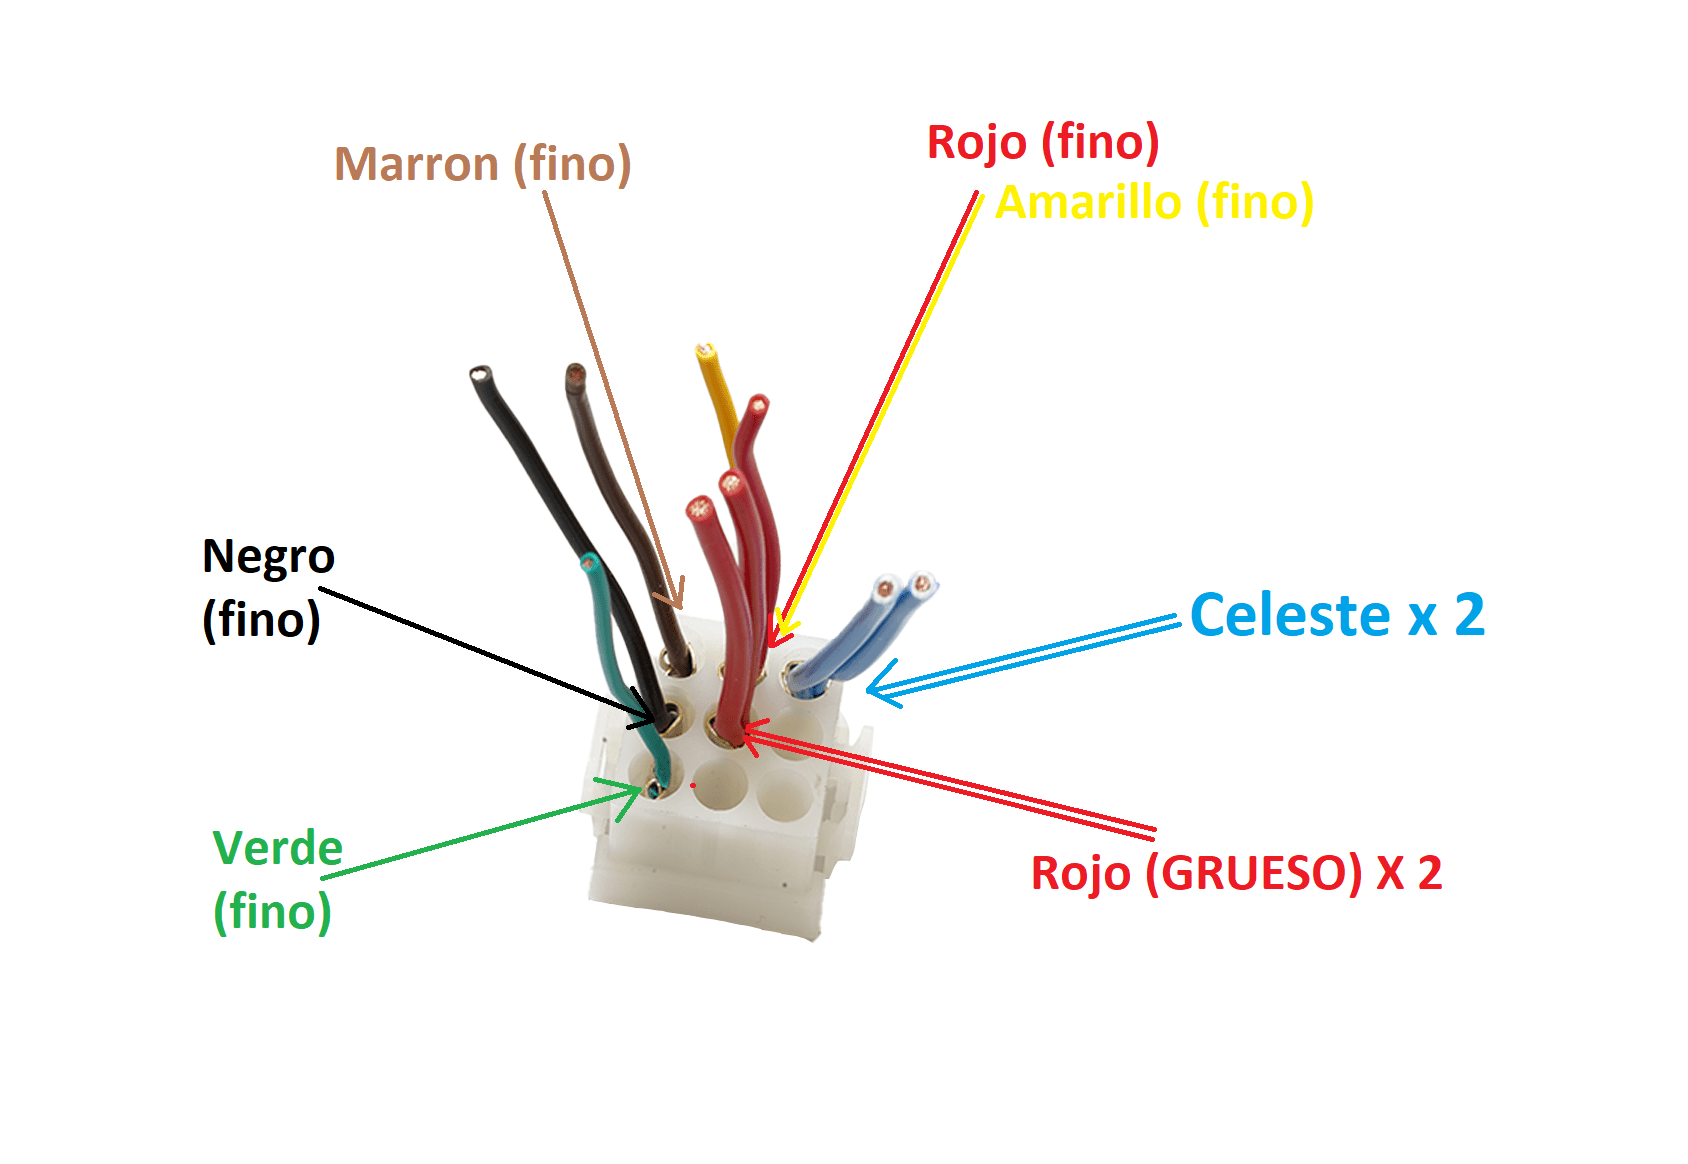
- In the event that any pin of the installation sleeve is badly connected, it is likely that the evaporative cooler does not work properly.
- There may be a problem in the connection between the command and the connection card, between the panel and the base of the evaporative cooler or between the air conditioner and the sleeve. See correct connectors and wiring
- It is important that the connectors are as shown in the following Photo.
Board - evaporative cooler Base

Command - Board
-The controller remains illuminated after the climate control is turned off (Only in Premium Control Panel)
- This is the default configuration to the controlller, if you want the controlller to turn off completely you must, with the controlller off, press the «-» (minus) key several times. In this way, the lighting will be lowered.
-The light is blinking on the control panel («No water» signal) but the water tank is full.
- The water tank´s pump is burned up or is not working properly. It is recommended to replace it.
- The sensors are sulfated, it is recommended to remove them, sand them with a fine sandpaper and replace them.
- There is a problem with the charging hose or the wires that reach the pump. It is recommended to check the wiring from the evaporative cooler to the water tank, making sure that the hose is not blocked and the electrical terminals are correctly connected.
-The fan only speeds up and down
- The electrical connection from the controlller to the motor may be loose. It is recommended to open the cover and check that the electrical connectors are correctly positioned.
- The engine may be failing. After several years of use and even more so if water gets inside the evaporative cooler, the motor coals deteriorate. It is recommended to replace the motor.
- There may be an electrical problem in the battery that prevents the motor from working properly. It is recommended to check the battery.
WATER FALLS INSIDE
It is highly unlikely that water will enter the vehicle, however it can rarely happen. The causes are multiple and most can be solved very simply by the user.
POSSIBLE CAUSES
The water tank is very close to the evaporative cooler.
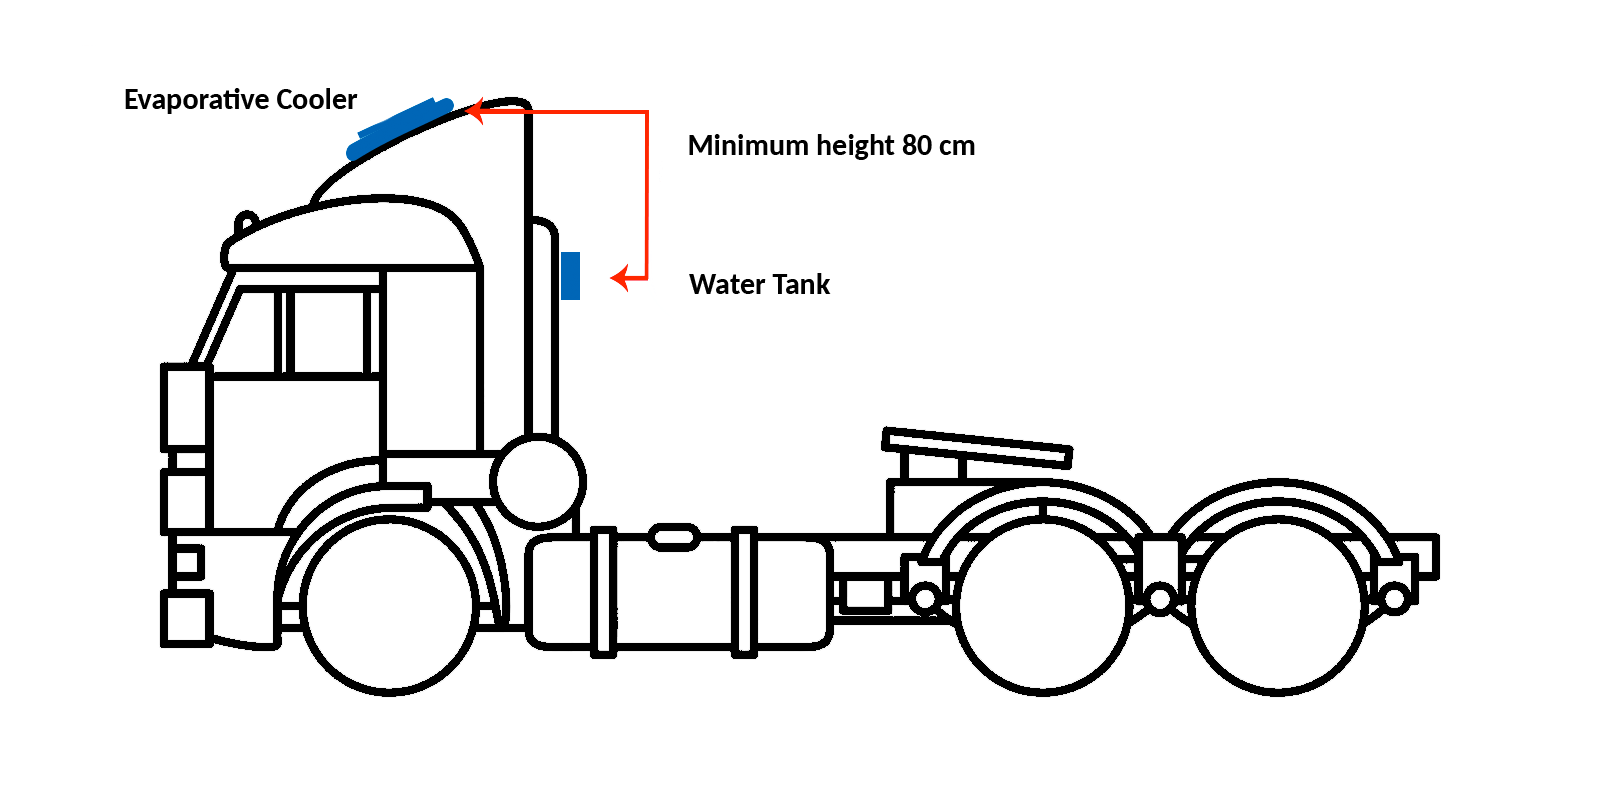
- If the vertical distance between the evaporative cooler and the top of the water tank is less than 35 in (80 cm), it is likely that as the vehicle moves, more water will enter the evaporative cooler than it should.
Solution: The water tank must be located at least 35 in (80 cm) below the evaporative cooler. If this is not possible, you will need to lower the power of the tank water pump.
Vertical distance between the evaporative cooler and the water tank
Set Power Connect Command (Bluetooth)
Set Power Premium Command
Evaporative Cooler Installed with Tilt Back
In the event that the evaporative cooler has been installed slightly tilted backwards, it is very likely that water accumulates inside and then that water enters the vehicle with the vehicle’s own movements.

In that case, it is recommended to do the following::
- Remove the evaporative cooler (you can help yourself by watching the Installation tutorials)
- Place a supplement to the weatherstripping at the back, to force the evaporative cooler to lean slightly forward once it is in place.
- Reinstall the evaporative cooler.
- Be sure to seal with Fastix or a similar product, in case there is any gap between the evaporative cooler and the roof of the vehicle.
There is some problem in the connection tab.
- In the event that any pin of the installation sleeve is badly connected, it is likely that the evaporative cooler does not work properly.
- There may be a problem in the connection between the command and the connection card, between the panel and the base of the evaporative cooler or between the air conditioner and the sleeve. See correct connectors and wiring
- It is important that the connectors are as shown in the following Photo.
Board - evaporative cooler Base

Command - Board

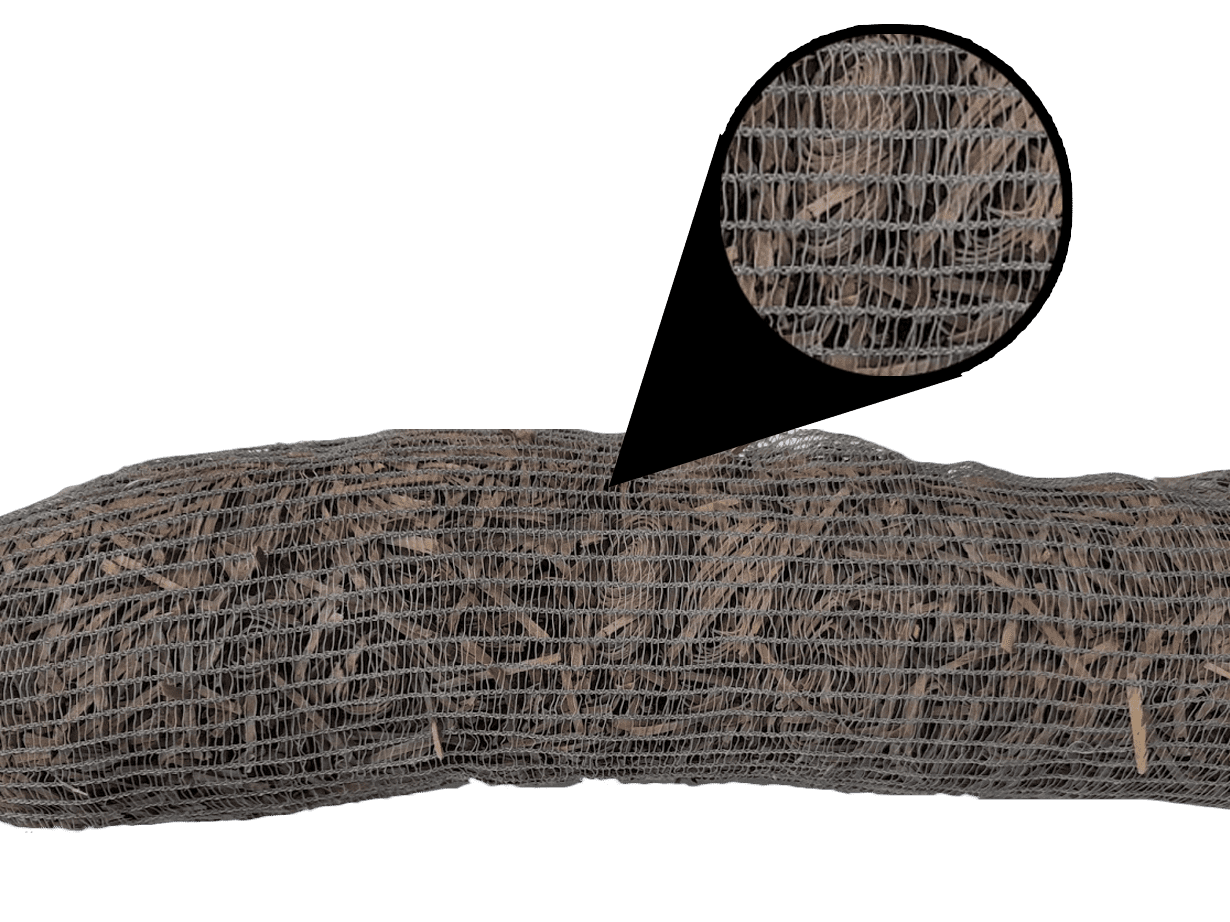
The wet filter is very dirty
- If the wet filter is full of dirt, the wood chips become waterproof and crushed, so the water that falls from the sprayer is sucked into the fan and enters the fan.
The water tank pump has a lot of power.
- If the water tank is close to the evaporative cooler, it is possible that the tank pump is sending too much water to the cooler each time it is required.
- Solution (only in Premium Control Panel): You can modify the power of the external tank pump, you must lower it to send less water to the evaporative cooler. You can see how to configure the external pump in the following video:
Set Power Connect Command (Bluetooth)
Set Power Premium Command
The irrigation tube is incorrectly positioned
- If the irrigation tube is not correctly positioned, some of the holes may be facing the motor and wetting it each time it irrigates.
- Solution: check that the irrigation tube is correctly positioned.

Premium 700

Slim Full – Camper
The connection between the water pump and the spray tube is not OK
- The humidifying water pump is connected to the spray tube through a rubber hose, if this hose is disconnected from the spray tube, the evaporative cooler will NOT cool and water can also enter the interior of the vehicle.
- Make sure this hose is correctly connected to both the pump and the «T» of the spray tube.

Water comes out of the evaporative cooler
If you notice water coming out of the evaporative cooler and ending up on the windshield or the side of the vehicle, you can easily fix it as follows::
1. Remove the shell of the evaporative cooler to the front, since, depending on the model, the hose is connected to the spray tube of the shell.
2. Check that the hose coming from the spray pump is properly connected to the spray head. It must be well connected.

3. Check the spray tube and make sure the holes are clear. We recommend that the 2 holes that are closest to the «T» of the spray tube are covered with insulating tape. This increases the pressure in the rest of the holes, improves the performance of the cooler and prevents water from escaping to the outside in some cases.

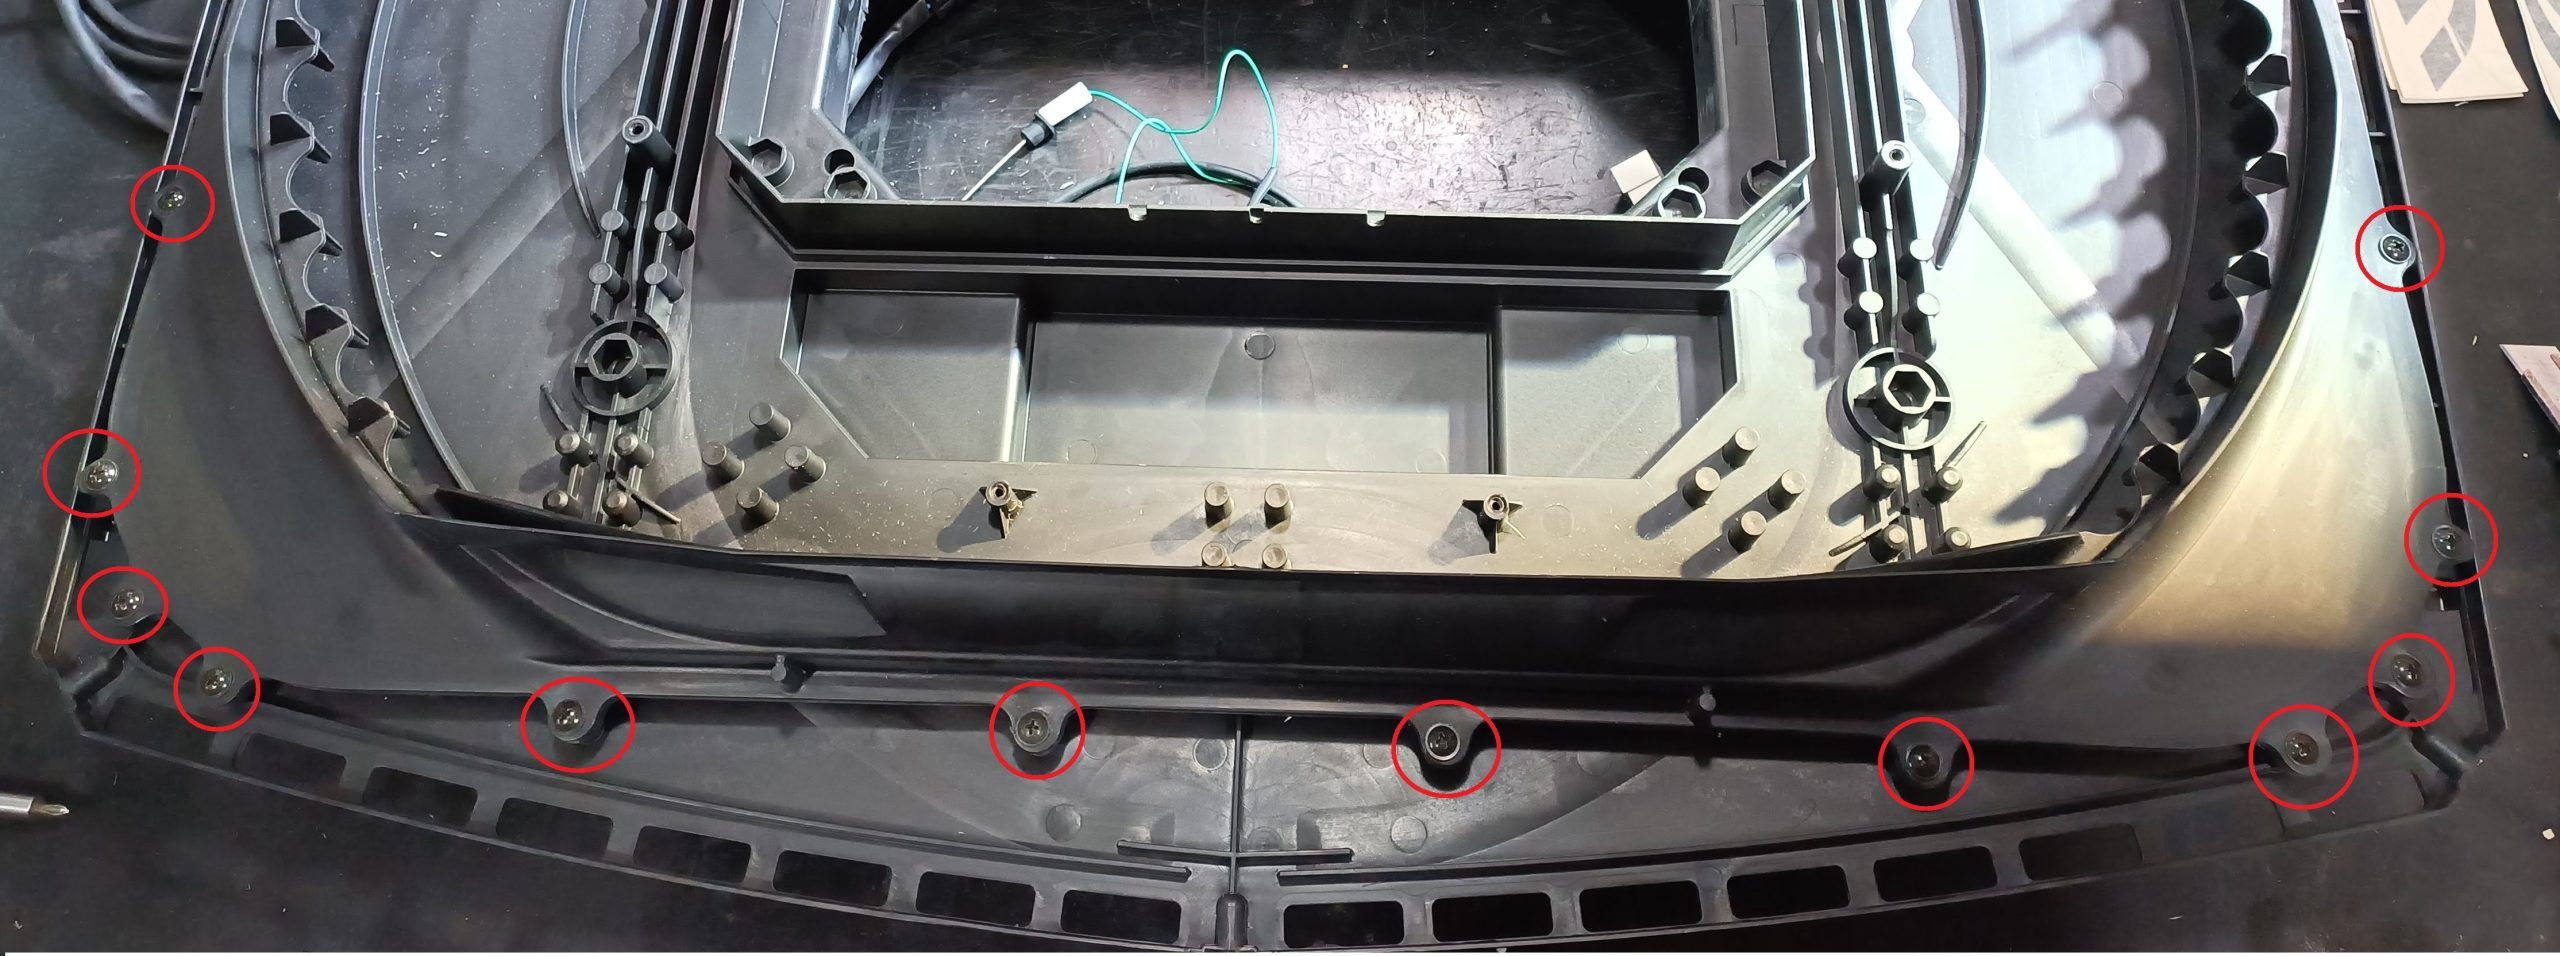
4. Between the base of the evaporative cooler and the external plastic ring (the plastic that contains the wet filter from the outside) there is a fine weather stripping. It may happen that this weather stripping moves and for this reason water comes out in some movement of the vehicle.
We recommend removing that external plastic ring by removing the screws marked in red in the following image (you must also remove the rear screws that hold this same piece) and check the state of the weather stripping.
Maintenance and Support
Learn how to install your Neil Evaporative cooler yourself, easily and quickly. Also, if you have any questions, BEFORE or after installation, you can enter our new section of tutorials, where you will find manuals, videos and much more material.
For questions or queries you can write to sales@neil.com.ar or you can send a WhatsApp to our technical support


